1950'S VINTAGE COAT | SIMPLICITY 8509

I wonder, what’s the first thing that came to your mind when you saw this 1950’s Vintage Coat? When I look at these photos, I’m in complete awe that I can do this. I’m amazed that I’ve come to a point in my sewing journey where I can create garments that look just as good as (and sometimes even better than) what’s available in stores. When I was in my early twenties, I used to admire a friend who sewed her own clothes . I couldn’t wrap my mind around how she could take a flat piece of fabric and make it into a dress. I never thought that one day I would be able to do the same. It wasn’t until I wore one of her dresses that I was determined to learn this craft. I’m so GRATEFUL!

I’m very proud to share this coat for two reasons. First, this 1950’s Vintage Coat almost didn’t make it to completion. Second, it’s an imperfect, absolutely beautiful garment that resulted from a labor of love, and a will to persevere to the end. Today’s blog post is two-fold. Of course, I’ll share the usual details. But I’m also sharing what went wrong. More about that later, but for now, let’s get into the details


Pattern Information
Simplicity 8509 is a 1950’s Vintage Coat & Jacket. The original release of the pattern was sold for only 50¢. It was re-released again in 2017 and is still available on the Simplicity website seven years later.
The coat/jacket has a shawl collar, and is designed with lots of extra room, making it suitable for layering on top of other bulky garments. View A is a coat with three-quarter raglan sleeves and deep, folded cuffs. View B is a jacket with long raglan sleeves, deep folded cuffs, welt pockets, and three buttons. Finally, View C is a jacket with a band at the lower edge of the one-piece raglan sleeves, and a single button closure.

Simplicity rates the pattern as AVERAGE (Intermediate), and I agree. If you are a beginner, don’t go near this pattern yet. I consider myself an ADVANCED Sewist, but this project brought me close to demoting myself back down to Intermediate. Hahaha! I encountered several issues that had me scratching my head, taking breaks, and almost quitting. It took me two weeks to complete the coat.

Let me preface the following by saying this: If you’re a sewist who takes issue with others sharing what went wrong, or pointing out mistakes with their garments, you may want to skip the next section. I learn from my mistakes and have no problem sharing them so that others can be forewarned of potential issues. Yes, I know we can be our own worst critics, but I believe there’s a difference between being a critic and allowing mistakes to be teachable moments for ourselves and others.
Since I cater to new beginners, and encourage them to learn from mistakes, I don’t want to give the impression that I always get it right. That is far from the truth. I have a lot of successes, but I’ve also had a number of unsuccessful projects. It’s all a part of the learning journey, and I love it. Except when I mess up good fabric. I’m not gonna lie – that hurts. This was “good” fabric, so I chose to push through. Hahaha! Let’s talk about it.

What went wrong?
It all started when I attempted to attach the back facing to the front facing. No problem! I’ve done this many times. But, for some reason, I couldn’t figure out how to align the two pieces. I read the instructions and studied the illustrations over and over again. I took a break from the project and came back with an idea. I pulled out the pattern pieces to see how they aligned. BOOM! Problem solved and it was super simple. I’ve included photos detailing the process, just in case you decide to sew the coat and get stuck on this part of the construction.


Fabric Information
When I saw the pattern, I envisioned it with a medium to heavyweight fabric for winter. One day, Style Maker Fabrics was highlighting their new Boiled Wool in lots of amazing colors on Instagram. I knew this fabric would be a beautiful pairing with the pattern, so I went to the website and ordered 2 different colors. This color is called “Ocean” on their website.

I used a cream colored satin for the lining that I purchased from JoAnn Fabrics. Unfortunately, I forgot to take a photo of the fabric bolt while in the store. But here’s the Casa Collection Satin Solids they have available on the website in multiple colors. It offers the right amount of drape and thickness for this coat.

Let’s talk about interfacing because when you’re sewing a coat with a nice wool fabric, a good, quality interfacing is important. Unfortunately, for me, I didn’t have the interfacing that I would normally use for this type of garment. Therefore, I used what I had on hand, this PELLON FUSIBLE MIDWEIGHT INTERFACING. However, if you’re interested in using the best quality interfacing for your coat, I highly recommend the SUPREME MEDIUM-WEIGHT FUSIBLE INTERFACING from Fashion Sewing Supply. They have the absolute best interfacing I’ve come across so far. There is a noticeable difference when using their products. The last time I shared about their company, the website wasn’t working. All is well now, so go check them out. ( I am not an affiliate for the company, but I love their interfacing.)

Inside the Garment
Let’s take a quick look at the inside of the garment.

One thing I noticed is that the sleeve lining is barely long enough to cover the raw edge of the sleeve cuff. I had to press up a tiny hem on the lining so I wouldn’t lose more length. I ended up sewing the lining very close to the edge of the cuff, so I wasn’t able to use my usual invisible hem. The instructions say to sew the lining 1″ above the lower edge of sleeve. The only way that would happen, in my case, is if I had folded the cuff deeper, which I didn’t want to do. If I were to make the coat again, I would definitely lengthen the sleeve lining pieces.


Notions Information
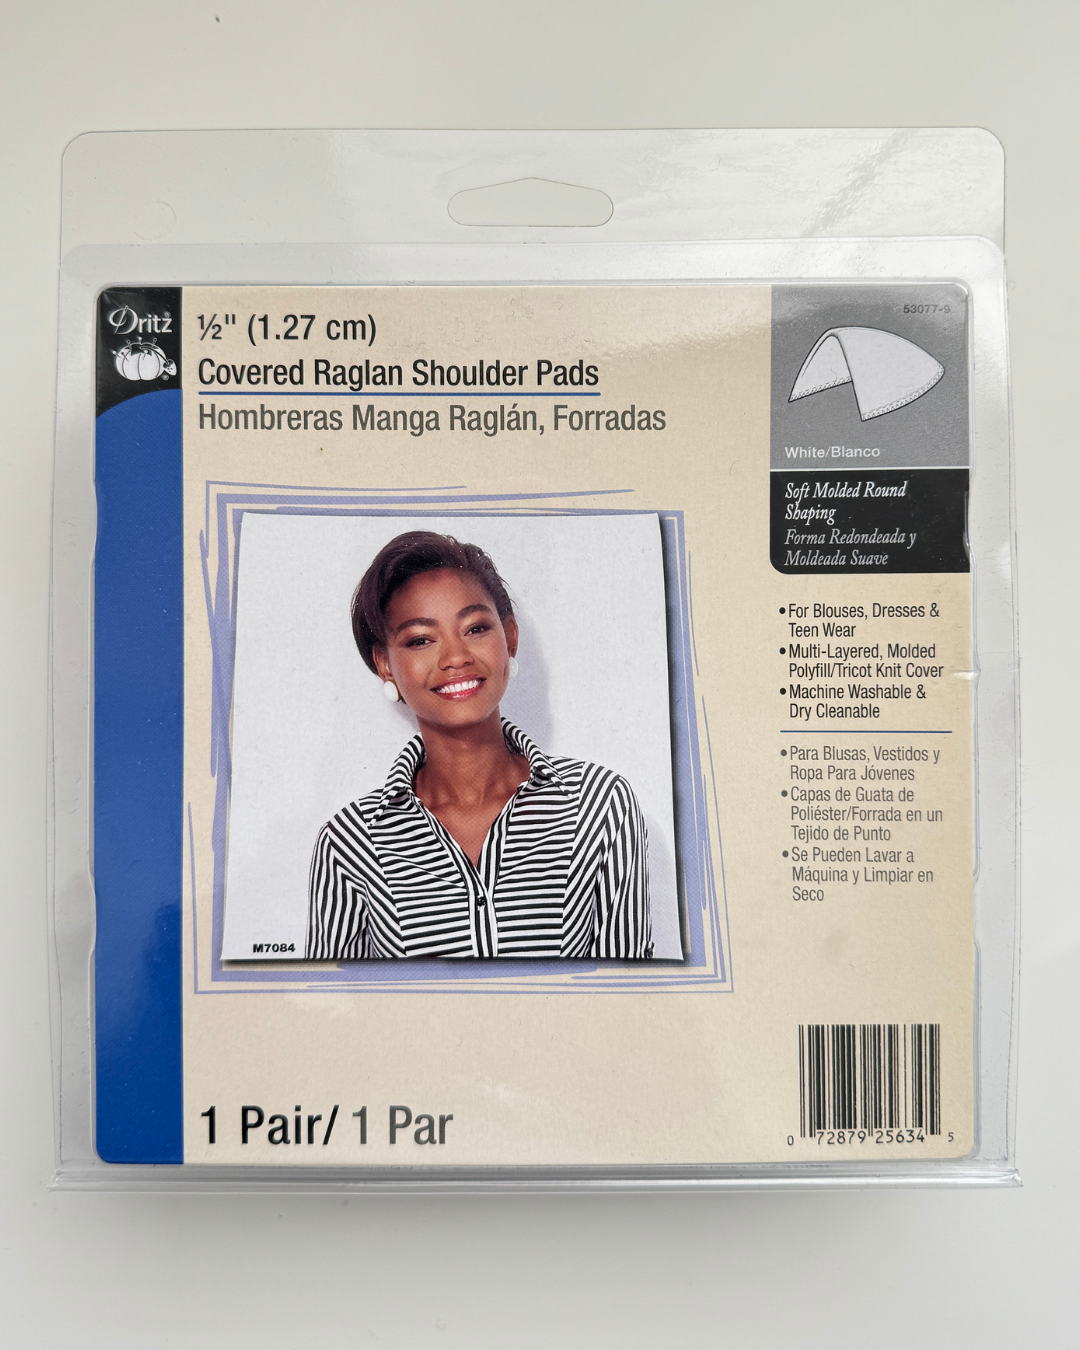
The pattern envelope lists several notions to complete the coat/jacket. They suggest 1/2″ RAGLAN SHOULDER PADS but these are optional. I was going to omit the pads because when I tried on the coat without them, it seemed okay. But when I placed the pads on my shoulders, it was a definite yes. The shoulder pads elevated the frame of the coat.
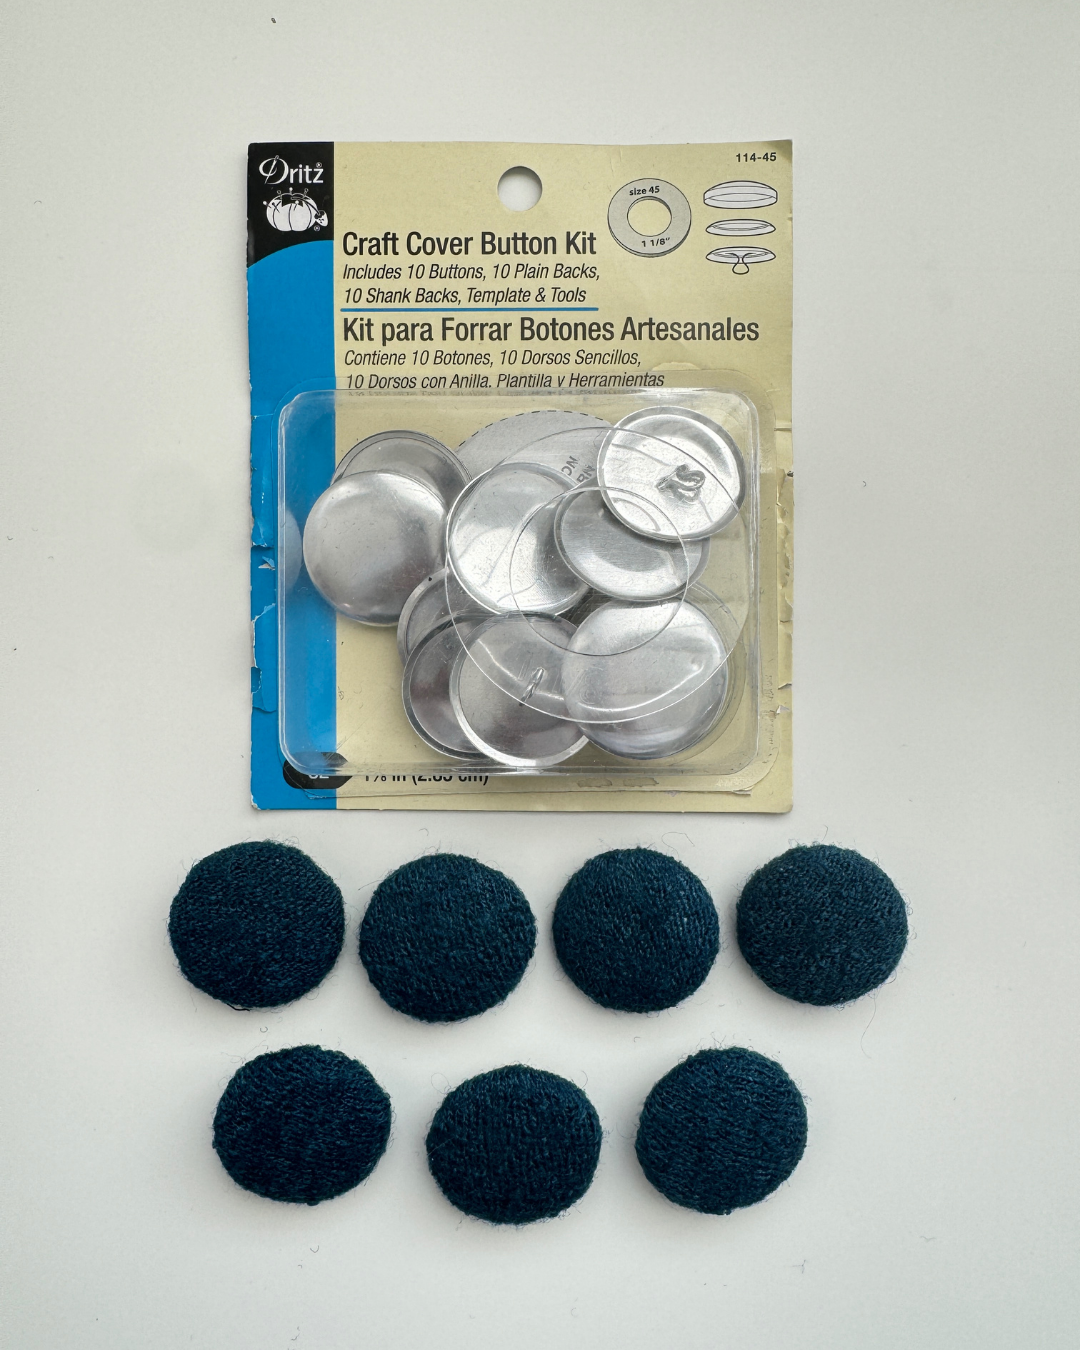
Views B and C call for 1″ button closures. Although View A doesn’t call for buttons, I wanted to add them anyway. You’ll read about my challenge with the buttons in the alterations section below. I decided to cover my buttons with the coat fabric for a more polished look. Therefore, I used the DRITZ COVER BUTTON KIT to get the job done. The kit comes with everything you need to create the covered buttons, including instructions. These buttons are actually 1 1/8″ but they still fit through my buttonholes. I would actually extend the buttonhole by 1/8″ in the future so that the buttons push through the buttonholes smoothly.
They recommend 1/4″ TWILL TAPE to reinforce the front edge of the coat on the main fabric. I used 1/2″ TWILL TAPE because that’s what I had on hand. They also recommend 1/2″ HEM TAPE to finish the hem of the coat. I omitted that part since the lining covered the raw edge of the hem, and I was ready to be done. Hahaha! I actually think the hem tape is a very nice touch.

Alterations & Construction Details
I cut a size 8 and didn’t make any alterations to the pattern, but I had to correct a big mistake. I sewed the beautiful bound buttonholes onto the front of the coat, totally forgetting that I needed an opening on the facing too. Instead of reading the rest of the instructions for View B that has buttons, I jumped straight into “fix it” mode. Hahaha!
My clever idea was to make regular buttonholes on the facing to line up with the front and tack them together. Genius! Well, not so much. The new buttonholes didn’t line up exactly, creating wrinkles when I button the coat. It wasn’t until after I finished the coat that I went back to read the pattern and saw the instructions were perfectly written to create the opening for the facing on View B, and it was far less work and more accurate than my method. The funny thing is, their method was actually the first thing I thought to do, but I didn’t think it would look right. Sigh! At the end of the day, my coat is still beautiful and I love it. I’ve shared some construction photos below of the bound buttonholes process with captions to explain the steps I followed in the pattern instructions.


I’m not a fan of hand sewing, but I couldn’t get around it with this project. Sewing the hem by machine on this garment would be pure tragedy. So, I put on some good old YouTube Podcasts and took my time to do it right. I hemmed the outer shell and lining separately. I ended up having to cut away some of the lining on the right side to even out the hem. I’m not sure what happened there but it’s even and looks good now.


If I were to sew this coat again, I would definitely use the self fabric for the back pocket piece that’s next to the body, so that you wouldn’t see the cream lining from the front. I didn’t think that one through.

Styling Options
After all that hard work, I can’t tell you how pleased I was to step back and look at this coat on the dress form. My heart was happy! Do you ever get heart happy after sewing a garment?

My original plan was to sew a new Nikko Dress in a cream color to match the lining. But then I remembered my Burgundy Cable Sweater Knit Nikko. OMGosh! These two colors together are beautiful. To bring it up a notch, I added my fascinator headband, black elbow length (evening) gloves, black velvet clutch, tea time lapel pin, burgundy pumps, and rhinestone jewelry. I love it so much. 💕

I’m ready for the Winter Tea Party, or any special occasion that requires dressy attire. The swing coat is a timeless piece that can be dressed up or down though. I plan to wear it with jeans and trousers too.


1950's Vintage Coat with Boots
When 1950’s Vintage meets the present! Oh, YES! Simply pairing the swing coat with a pair of modern boots demonstrates how timeless the garment remains today.


What do you think?
What do you think about this 1950’s Vintage Coat? I would love to hear your feedback. Scroll to the very bottom of this page to leave a comment.

Thank you for stopping by today! 💕

Other Related Links
(DISCLAIMER: This blog post may contain affiliate links, which means that if you click on one of the product links, I’ll receive a small commission on qualifying purchases. All opinions in this post are my own.).)
Don't Forget your Sewing Project Checklist
I created a Sewing Project Checklist to help you stay organized while sewing your garments. If you missed the video where I shared 3 Steps to Time Saving Sewing for Beginners, check it out to learn how you can streamline your sewing process. Tap the button below to get a Free PDF copy of the Checklist.

Join My Community
Join others in my community for early access to new courses, exclusive member benefits, giveaways and updates when new content and products become available.

You Should Share This Blog Post With Your Friends


BABY LOCK SEWING MACHINES


This Post Has 105 Comments
This is a gorgeous outfit! It looks great on you.
I love the colors and I hope to make it some day. I had seen the pattern but wasn’t interested because of the shape but the drawing on the pattern doesn’t do it justice.
Thank you for taking the time to share your great work!
Anita you slayed this coat. The color was gorgeous, the accessories were perfect.
This is so gorgeous….I wish I could sew like this!
Love your coat.
Hi Anita love your coat❤️I have this pattern so than you so much for all the information 🥰
I want to come stay with you and sew and talk about God. Lol
Oh, wouldn’t that be a great time. 💕💕💕
I just loved that coat with the sweater dress. The colors just made my day two of my favorite. You are inspiring me to go back to sewing garments. Something I haven’t done in a few years.
Yes, Janice! Come back to sewing! 🤗
You look like you stepped out of Vogue magazine.
I would prefer a lining that matched the coat.
You did a great job.
Thank you, Lorraine
I love 1950s style and that coat looks superb on you.
Hopefully my health will eventually allow me to make a coat for myself. For now I’ll be happy to make anything.
Hi Marita! Thank you so much. I pray you will be well soon and able to get back to sewing. 💕
The color is just stunning! Combined with the Nikko dress was an OMG that is gorgeous moment when it popped up in FB. Just LOVE it and you look stunning. Love the fascinator!!!
I have a New Look coat that is very similar. I cut it more than a decade ago. Yup, that collar area stumped me. It got packed away in the UFO pile. Three months ago I got it out and bam, it made sense. 45 minutes of sewing and it was basically done. But the lining is all kinds of catywompass! But I am going to finish it by Easter! Same issue with the pockets so I took them out but I think I am going to put them back in as the fashion fabric in the back and lining in front. Contemplating one – JUST ONE – bound button. Your bound buttons had me thinking visits to the spa would be the only way that was going to happen…
Thank you for all the inspiration and yes I do learn from mistakes!!!!!
Elizabeth, thank you so much for sharing with me. You had me laughing out loud for real. 😂 Isn’t it something when that “AHA” moment happens and you GET it? I believe you will finish that coat by Easter. You can do it, Elizabeth! I’m rooting for you. Have fun completing and wearing your coat. 💕
What an absolutely stunning look! Beautiful work–incredibly professional looking. It’s better than you can buy in stores! Your skills are so top notch. Love it!
Thank you, Katherine! 💕
The coat is beautiful and perfect fit. Awesome
Thank you, Rhona! 💕
Your coat is stunning! I absolutely love your thoroughness of the details on all of your work❤️
Thank you, Jackie! I’m glad you can appreciate the details. 💕
Anita you look stunning the coat is beautiful 🧵🙏
Thank you, Ellen! 💕
I love this coat and I especially love the detailed blog post with all the details you provided of not only the positives, but also the negatives (that I must say you turned into positives, evident by your stunning coat.
Thank you so much, PJ! I’m so glad you enjoyed the blog post and all the details.
Anita you nailed it, gorgeous as always.
Thank you, Yolanda! I love it so much. 💕
Thank you for sharing all your ups and downs with this 1950’s coat pattern, I plan to make it and will be using the Boiled wool also, She’s a beauty.
Awesome! I”m so glad you appreciated the details about the ups and down. Have fun making your coat.
Hi Anita. As always you knocked it out of the park with this one! It’s just beautiful. When I see what you’ve made, I’m always inspired to try something new. But my outfits don’t look as good as yours. but I’m going to keep trying. Thank you for sharing. You always look so amazing.
Thank you, Marilyn! I’m glad to hear that you’re inspired. Just keep sewing because the more we sew, the better we become. 💕
Very nice. You could also wear this over leggings to dress them up.
I love the coat and the color looks good on you
This look brings back precious memories of the era when women looked so fabulous in dresses, swing coats, hats, purses, jewelry, makeup and gloves. It was such a glamorous time! You did an excellent job!!! Thank you bunches for sharing the hiccups; a lot can be learned from them. Vintage sewing has so many details but that contributes to the unique look it offers. Combining the coat with your burgundy Nikko dress is a smashing fashion statement. I’m so happy pattern companies are reintroducing patterns from past times. It’s good to see women look chic and stunning. Put another notch on your sewing machine, Anita! Without a doubt, this is a first-place winner!
Oh, thank you so much, De! I love the way women dressed back then. Such elegance and class. Yes, indeed, we learn a lot from our experiences and I’m here for all the lessons. I’m glad you like the coat and it’s definitely a winner in my book too. 🤗💕
Anita you have created some really outstanding outfits! But girl!!!!! You outdid yourself with this one. Omg this is positively gorgeous and the color! I have no words lol! This coat is incredible. Wish there was a sew along! For this because you knocked it outta the park. Bravo 👏🏻
Thank you so much, Yvette! I’m telling you, I feel the same way. This is definitely at the top with a few other favorites I’ve sewn over the years. Every time I look at this coat, my face and heart both smile. 💕💕💕
Absolutely stunning! You always look so beautiful in your photos but THIS is my absolute favorite (so far)! I ordered the pattern so I can make it too following your instructions. I really appreciate you sharing the good with the bad and including what you would do different next time. Thank You! I now have the courage to follow your example in sewing and in life.
Oh Marcia, my heart! Thank you for your beautiful words. I’m so glad you enjoyed the details in the post and will be sewing your swing coat. YES! Thank you for making me smile. 💕
Your coat is just gorgeous!!! Haven’t seen bound buttonholes in a loooong time – my mom always looked for quality details like that when she was shopping for coats, and in fact, this pattern reminds me of photos of her from the 50s in similar styles. I also really appreciate it when you or any other sewist includes details about the good and the bad of sewing something – if I think I make mistakes and no one else does, it becomes very discouraging, plus sharing difficulties and how they are overcome is so helpful for others – we’re here to help each other, right? I sure hope so! Anyway, the coat is just beautiful!
Yes, yes, YES! We are here to help each other. I love it when I can learn from others because it helps me to improve my skills. Books are a great resource, but seeing someone else put the skills to practice is so inspiring for me. I’m glad you appreciate those details.
You look like a page from Vogue magazine.
My only suggestion would be to use a similar color lining or perhaps a pretty print.
You nailed it.😊
Thank you, Lorraine.
What a beautiful coat. So much attention to detail, which definitely elevates it to a higher level. We all sometimes encounter problems with sewing patterns, thank you for high lighting these. The jacket on the pattern reminds me of a jacket my mum wore when I was a child. Thank you
Thank you, Susan! I agree that the details really do elevate garments.
So classy! Hoping over from PR. Thanks for the detailed review and helps for those who decide to make this gorgeous coat. You look so classy!
Hi Melissa!!! Thank you for coming over to check out the post. I’m glad you appreciated the details. 💕
Hi Miss Anita,
What a beautiful coat – the fabric and the color. I always liked boiled wool….just something about it.
Thanks for sharing the highs and lows of this coat and very happy that you pushed through 😊. I think it’s great when you share tips and tricks and what to do and what not to do. It definitely is a big help.
I am far, very far, from sewing anything like this, but always enjoy seeing how you put everything together and how you style it.
Thanks as always,
Lynette P.
I’m so glad that you appreciate seeing and hearing about the highs and lows. They both help us to grow in our skills.
Hello Anita, what a stunning, classy and elegant coat! I love, love, love the drape at the back and also the covered buttons. I think the covered buttons definitely add to the polished look and also allow you to accessorise in lots of ways without there being too much going on. I’m so pleased you persevered! If I had made that beautiful coat, I would refuse to take it off!!
Love from Jill xx
Thank you so much, Jill. I totally agree about the buttons and that’s why I like using them. No concern about the buttons clashing with anything else. Yes, I agree, the coat is so beautiful that I want to wear it everywhere. 😂
I just love everything you make, but I have a question about the button holes on this swing coat. I noticed you had fabric and interfacing around the hole. Is this something the pattern called for or is it something that you just do. And the coat is beautiful!
Hi Letitial! yes, I followed the bound buttonhole instructions precisely, adding the interfacing and fabric squares.
For years I am looking for a coat I had in mind . This is the one.
It is gorgious. Your color choices are beautiful.
One day I will try to make this coat. Thank you for sharing this with us.
Awesome, Cher! I’m so glad you’ve found your coat. Have fun when you sew it for yourself.
Wonderful creation!
I love how the back drapes.
All your hard work paid off. Well done you !
Thank you so much, Marie! I love that back drape too. And, YES, it paid off big time because I will get lots of wear from this coat.
Absolutely stunning! Love it and you certainly have an eye for color choice and style.
Thank you so much, Brenda! 💕
This coat is absolutely fabulous !! Totally yells “class” !!!!
I have not made this coat but I would try to match the lining to the colour of the coat. As well, if I made the coat, I would not put the top buttonhole in it.
This could potentially be my next sewing project 🙂 🙂
Yeeesss, Ann! Total class! Have fun making your coat. It’s going to be fabulous with the matching lining. 🤗
Beautiful job! Your work is wonderful!
Hint: if you cut a 2” strip of the wool fabric and attach it to the upper edge of your pocket back, you won’t have the pocket lining peeking out at you when wearing the coat. You can turn under the lower edge and top stitch it, leaving the other edges raw, and continue on constructing the pocket as usual. Many older patterns included a pocket facing piece for this purpose. It helps when you’re using a contrasting lining fabric.
Oh, thank you for the tip, Linda! I will see about doing this to hide the lining.
The coat is stunning. I love 50’s fashions in general, but you made that one look very up to date. It was worth all the struggles; I bet you will wear it alot, even with a pair of jeans.
Thank you Sue! Yes, I will wear it a LOT!!! 🤗
Absolutely fabulous, love it!
Thank you, Wendy!
Hey Anita! I got that very pattern! Your coat looks really nice!😊
Thank you Arleathia!
You’re The Best Anita! Beautiful job! I need to get myself motivated!
Thank you Gwendolyn!
What a beautiful coat!
Thank you Kathy!
Elegance all the way!! I LOVE the color!! Excellent job!!
Thank you Charlene! YES! It’s such an elegant garment.
I saw this paytern and putchased it this winter, for next winter. The construction information offered in this post will be very helpful when I tackle this project.
Awesome! I’m so glad you read the post before sewing your coat. Have fun when you make your coat.
Haven’t been courageous enough to try bound buttonholes. You make them look easier than I imagined. Love the swing coat!
Gwendolyn, they really are easier than they look. This was my first time sewing them too and I can’t wait to sew more. They’re absolutely beautiful. You should give it a try. I practiced on a scrap piece first and it wasn’t difficult at all.
Magnificent! I’d find it difficult NOT to live in that coat. Its a beautiful piece of work and it looks SO cosy!!!!!!!
Oh my goodness, Jeanne! I want to wear the coat everywhere! Hahaha!!! I agree with you and I’m so happy to have it in my closet. SO HAPPY!!!
Gorgeous, Ms. Anita!! I have not tried to make a coat yet but it is on my sewing list. How do you find the texture of the wool? Is it itchy? I’ve used wool jersey knit in projects with great success, but always afraid that the heavier wool fabrics would be itchy or too warm for the relatively mild California winters.
Hi Nikki! This wool can be itchy and that’s why you must insert a lining. The collar with touch your skin but I don’t find that to be bothersome. If it were an issue, you could wear a scarf to keep it off your neck. It get’s really cold and windy in my town (with snow some winters), so the wool works for me.
Your coat is lovely and functional, a great combination! I follow you, though I haven’t done garment sewing in about 30 years, I switched to quiltmaking, which I love. But in the 1970’s I made a beautiful navy wool coat lined in red. I didn’t tackle bound buttonholes on that one, I made it a tie waist. I made two other coats, one in green light weight fabric, the other in animal print plastic, with a matching purse. I loved them all. But I did struggle! So glad you persevered, it was worth it!
Oh wow, you’ve sewn quite a few coats, Brenda. love the idea of the navy wool coat with red lining. Oh, that must have been fabulous. I have so much respect for quilters. I’ve never sewn a quilt. I really admire the beautiful pieces that quilt makers create. Absolute amazing talent. Thank you for sharing with me, Brenda.
Anita, that coat is beautiful! I’m glad you shared your mistakes. I’ve been sewing for over 40 years and still make mistakes. Some small and some are huge (like I should know better). But I also learn something new every time I make a garment. Keep sharing your beautiful makes.
Yes, YES, Sharon! You are so right. I also learn from every mistake. I laughed when you said, “I should know better,” because I feel the same way with some mistakes. 😂
What a beautiful coat! I recently went to a tea party at my church, and that code would’ve been wonderful addition to my wardrobe. Thanks for sharing.
Oh my goodness, Daphne! Yes, this coat would have been perfect for your tea party. I can’t wait to wear my coat to a winter tea party.
The coat is beautiful and the styling top notch!
I agree with you regarding the pocket lining as I noticed it right away. But can we talk about the details of the unique curve of the collar in the back and the flow those darts create?! Chef’s kiss.
If I do this project, I’m seeing it in a warm, cozy brown shade. Exciting!!!
Thanks for sharing. ~cw
Oh my goodness, Cornelia! The details they designed into the coat are definitely top notch. A brown shade would look so beautiful. Thank you so much. 💕
Love, love, love it! I too appreciated the style and dress of the women of that era. So feminine yet no nonsense. I would love to see a resurgence of that kind of style. Thank you for the blog, Anita!
Oh my goodness, Audrey! I would love, love, love to see aa resurgence too. Classy, elegant, and graceful is how they presented themselves.
Love that coat!!
Thank you Karen.
Beautiful coat! I love the color of the boiled wool used and options the pattern offers. Thank you for sharing your experiences in sewing this project. It is so motivating for me to get back into sewing my clothes.
Hi Lynette! I’m glad you enjoyed the post and feel motivated to get back into sewing. YES! 🤗
This was a wonderful detailed description of the beautiful coat! I’m not sure I’m quite ready to give it a try but it is certainly going to be on my list.
Thanks for posting!
Thank you, Carol! I’m glad you enjoyed the blog post. Yes, add it to your list for later. It’s a timeless, classic garment.
Love this coat. And love that you shared your mistakes. I agree with you-we learn from our mistakes. Thank you.
You’re welcome, Sheila. 💕
I’m so excited to make this coat now. Thank you do much for the detailed blog post. It turned out so beautiful!
YES! I’m so glad you read the post and found it helpful for sewing your coat. Have fun with your project.
Beautiful garment! Enjoy wearing it. I noticed the style of your hand hem stitch, it is the same as what I learned from my grandmother.
Thank you, Betty! I will definitely enjoy wearing it. That hem stitch was perfect for attaching the lining with the limited space.